
Achieve scale and customization with our punched components and assemblies, delivered in as little as 3 days. Fast, precise, and tailored to your needs!
ISO 9001:2015 | ITAR Registered | Quality Documentation Options
Our design review includes a 30-minute virtual session with a sheet metal applications engineer, where you can discuss any questions about your project. We’ll cover key topics like punch tooling, material parameters, and feature spacing to ensure your project meets all requirements.
Our online sheet metal punching service delivers high-quality, functional products in just a few days. Every project includes valuable design-for-manufacturability (DFM) feedback and expert support. Choose from a variety of finishing options to meet your aesthetic needs.
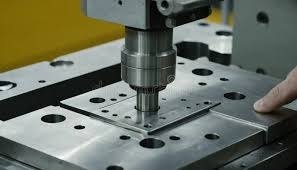
Punching in Various Stages:
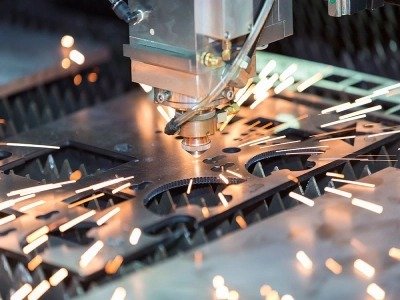
Sheet metal punching is a precise metal cutting and shaping technique where a punch press applies force to a material, using specialized tools known as the punch and die, to create various profiles, holes, and custom shapes. This fast, repetitive process shears the sheet metal against the die, producing highly accurate features and cutouts.
With Protolabs’ punching process, a wide range of features can be created, including:
Precision punching incorporates features into your project with exceptional accuracy.
With Protolabs’ punching services, you’ll gain several key advantages for your next sheet metal component or assembly project:
Punching, along with laser cutting, is a versatile process that can be used on many types of sheet metal. While both methods can handle a variety of materials, the acceptable thickness ranges differ. Below are the thickness specifications for commonly used materials:
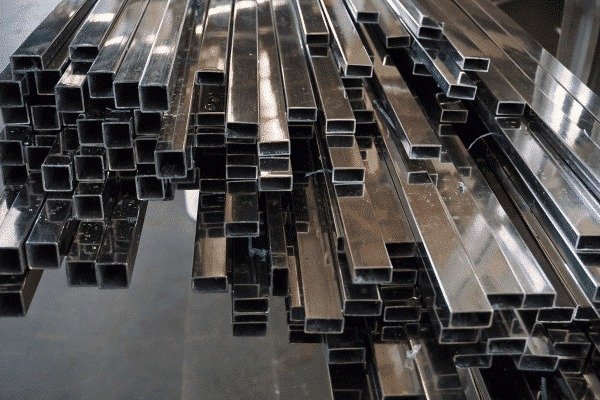
Aluminum 5052-H32 offers corrosion resistance as a formable and weldable material.
Punching sheet metal parts can be challenging. To simplify the process for your next project, keep the following manufacturability considerations in mind. These tips can help manage costs while ensuring high-quality results.
Spacing and Hole Size
Standardization and Tolerances
Feature Dimensions and Orientation
Additional Guidelines
By following these guidelines, you can design dimensionally accurate, cost-effective, and high-quality parts.
Punching offers a versatile solution for creating custom profiles and formed shapes in sheet metal projects. The following details are a quick reference for commonly available cutouts and formed features. If you’re unsure which tools (in-house or custom) are right for your design, consider a free 30-minute consultation with our application engineers.
Keep in mind that custom punch tooling can increase both the cost and lead time of your project. For budget-conscious designs, in-house tooling is often a more economical choice. During the design review, our engineers will help identify the most critical dimension—height, inside diameter, outside diameter, open area, or another feature—to recommend the best in-house tooling option for your needs.
A lance tab is a specialized form tool that slices and elevates a portion of sheet metal, forming a hook or tab-like structure. These tabs serve various purposes, such as mechanical fastening, hanging, providing ventilation, acting as clips, and functioning as stops.
A single-hit punch tool is often the most efficient and cost-effective choice when working with designs that incorporate multiple small, straightforward bends.
Single-Hit vs. Progressive Tooling:
Single-hit tooling is typically used for this application.
Bridge lances in various shapes and sizes serve as decorative and functional elements in sheet metal design. Our standard options typically include single bridge form-up tools, but custom tooling can be arranged. Unlike lance tabs, bridge lances rely on two contact points with the sheet metal, creating a bridge-like structure.
These features can be used in various applications, from securing clips and enabling airflow to allowing cable pass-throughs and providing fastening points. In many cases, bridge lances function similarly to TD (cable tie-mount) hardware offered by PEM®.
Single-Hit Tooling Only:
Bridge lances are typically manufactured using single-hit tooling.
Extrusions in sheet metal are created by driving the material through a die to form a raised, shaped feature. These extruded features are often used in applications such as electrical contact points, threaded holes, standoffs, and channels for airflow or gas passage.
Extrude-and-tap techniques can provide an efficient alternative to hardware insertion for higher-volume production. This approach helps reduce part costs while maintaining functionality and performance.
Single-Hit Tooling Only:
Extruded features are typically produced using single-hit tooling.
Half shearing is a versatile tooling method that partially cuts through a metal sheet to create raised features or deliberate deformations. These features can serve as visual or tactile indicators for assembly, allowing parts to snap together or act as substitutes for traditional tabs and lances.
Tooling Method:
Half-shear features are typically produced using single-hit tooling.
Perforations come in various shapes and sizes, but their purpose is consistent: creating holes or slots while leaving minimal material between them. Punching is often the preferred method for achieving these designs, as lasers can cause heat-related material deformation. A cluster tool is typically employed for multiple holes or slots, allowing several perforations to be created in a single punch operation. The image below showcases an example of an in-house hex pattern tool.
Key Design Considerations:
Common Applications:
Perforations are frequently used for ventilation (such as in openings for case fans), filtration, drainage, decorative purposes, and weight reduction.
Tooling Method:
Perforations are typically made using single-hit tooling.
Louver tools create slotted openings or vents commonly found on panels or electrical enclosures made from sheet metal. In electronic enclosures, louvres play a crucial role in improving ventilation and helping to manage the temperature of internal components.
Tooling Method:
Louvres can be manufactured using either single-hit or progressive tooling.
Ribs are often elongated, raised metal features incorporated into designs to improve strength, rigidity, or stiffness. They enhance structural integrity without adding significant weight. Ribs can have a flat or semi-circular profile and are commonly used in electronic enclosures to assist with thermal management while reinforcing the design’s overall rigidity.
In addition to providing strength, ribs can create a gap between components, lifting a secondary part above the main component’s base.
Regarding manufacturing, progressive tooling is typically employed over single-hit tooling.
Embossing, or dimple forming, tools add functional and aesthetic improvements to sheet metal designs. These features can be applied individually or in a pattern and serve various purposes, such as acting as spacers, mounting points, or enhancing visual appeal. Embosses can take on multiple shapes, most commonly round, oblong, or rectangular.
Embosses are also helpful for holding magnets or concealing hardware heads, maintaining the structural strength typically provided by a hidden head.
For manufacturing, single-hit tooling is generally used rather than progressive tooling.
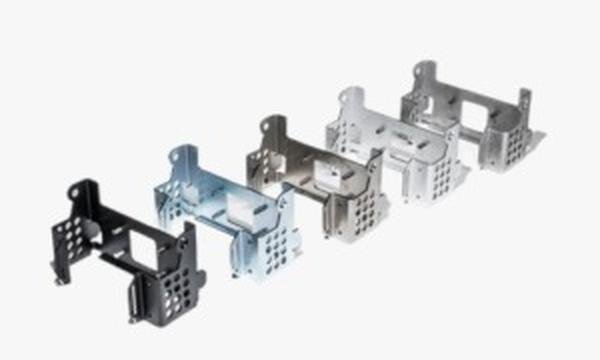
Sheet metal designs with punched features can be used as individual parts, but they are more frequently part of larger assemblies, sub-assemblies, or weldments.
We provide the following assembly services to ensure your project is ready for immediate use upon arrival:
Lead time: Assembly processes typically add 1-3 days, depending on the number of components involved.
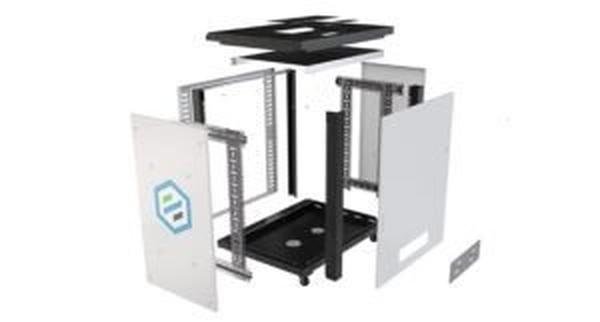
Our assembly services allow customers to use their parts on arrival.
Along with custom features and geometry, our finishing services for punched components and assemblies provide the ability to meet your aesthetic needs. We offer the following finishing options:
For more details, please visit our finishing options page.
Lead time: Adding finishing typically adds 1-2 days per finish. More information can be found on our finishing options page.
A range of finishing options provides essential aesthetic enhancements to any sheet metal component.
Junying Metal Manufacturing has developed high-level manufacturing technique in production fields of machining.
Address: Gang Kou, Zhong Shan City, Guang Dong Province, China.

